- About Us
- Blog & News
- …
- About Us
- Blog & News
- About Us
- Blog & News
- …
- About Us
- Blog & News
Our Factory
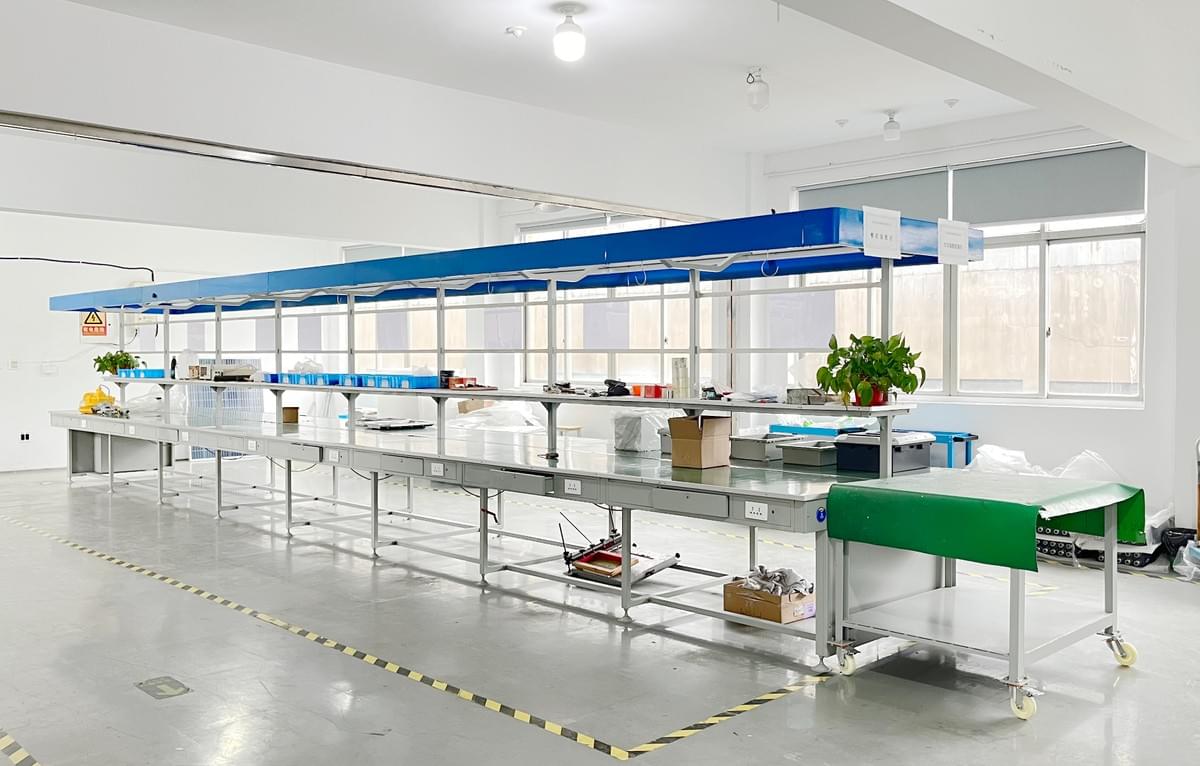
Assembly Workshop
Ourdedicated team, with an average tenure of 15 years, assembles over 10,000 units of explosion-proof equipment monthly, including ex-proof lighting, ex-proof distribution box,ex-proof junction box, ex-proof accessories. Their seasoned expertise ensuresthat each product not only meets industry standards but exceeds yourexpectations for reliability and safety.

Distribution Box Assembly Table

Lamp Assembly Bench

Finished Distribution Boxes

Distribution Box Assembly Table

Assembly Hall

Distribution Box Assembly Table
Factory Equipment Overview
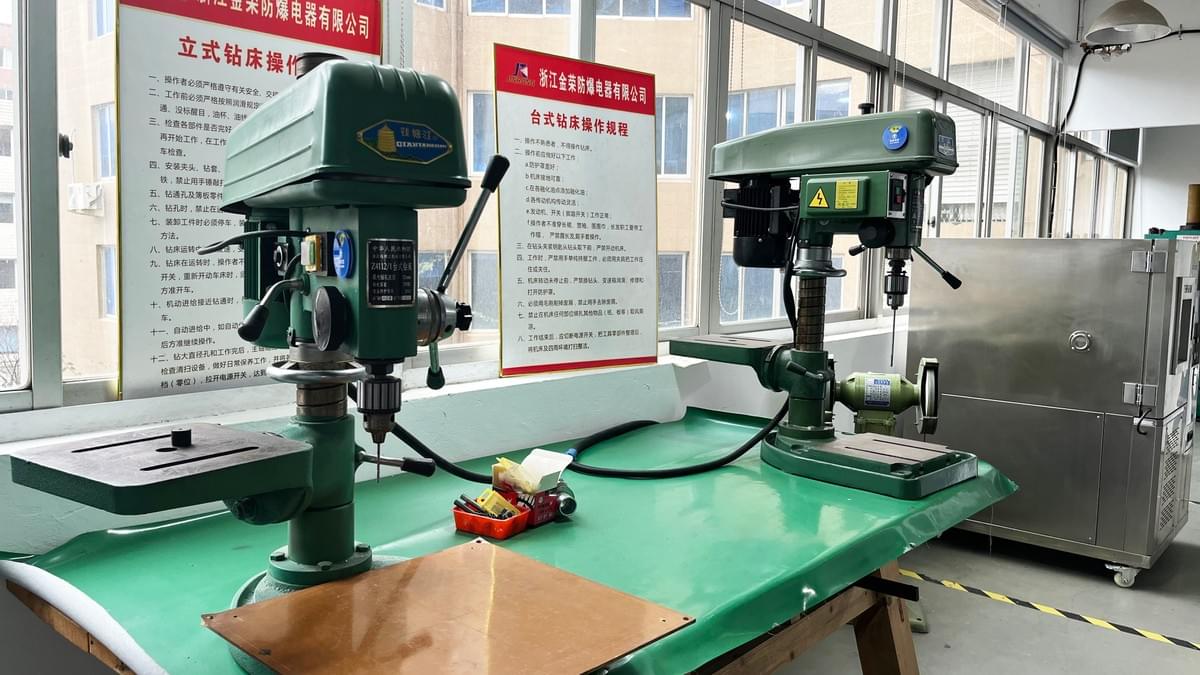
Our factory boasts over 20 specialized machines, including precision bench drills and CNC lathes, making sure expertise in manufacturing explosion-proof equipment.
FACTORY EQUIPMENT OVERVIEW
Benchwork Drill

Bench Drill

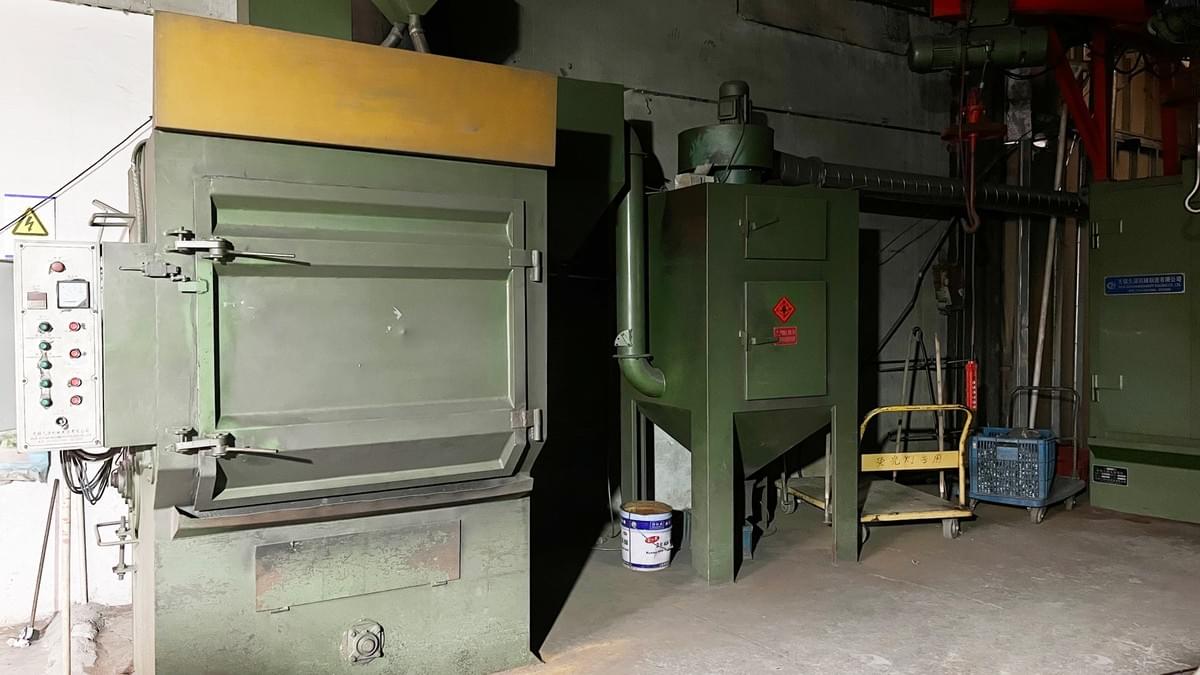
Slot Blasting Machine

Bench Drill

Slot Blasting Machine

Bench Drill

Rocker Arm Drilling Machine

Bench Drill
Drilling machines are used in various mechanical processing fields and mold manufacturing. They can drill holes in various materials such as metal, plastic, wood, etc. At the same time, drilling machines can also be equipped with different accessories and tools, such as drill bits, taps, etc., to meet different processing needs.
Radial drilling machines are powerful and versatile hole processing equipment. Mechanical radial drilling machines use mechanical transmission methods for lifting, rotating, and other actions, with a relatively simple structure suitable for some simpler processing requirements.
A shot blasting machine is a casting equipment that utilizes a shot blaster to clean or strengthen the surface of castings by throwing high-speed projectiles. Shot blasting machines can simultaneously remove sand, cores, and clean castings. Some regions also refer to them colloquially as sand blasting machines.
Shot blasting machines are used to remove burrs, membranes, and rust that may affect the integrity, appearance, or definition of an object. They can also remove surface contaminants from a portion of a coated surface and provide a surface profile that increases coating adhesion, thereby strengthening the workpiece.
When the castings are delivered to the factory, they are first sent to the fitter area and then to the shot blasting machine for shot blasting cleaning. This process removes surface defects of castings such as subcutaneous pores, slag holes, as well as adhered sand, cold shut, and skinning (removing burrs, membranes, and rust).
The main functions of shot blasting machines are as follows:
1. Surface cleaning: Shot blasting machines can effectively remove impurities such as scale, rust, oil stains, and welding slag from the surface of workpieces, achieving a certain degree of roughness and providing a good foundation for subsequent coating or processing.
2. Surface strengthening: Shot blasting treatment can form a certain compressive stress layer on the surface of the workpiece, improving its fatigue strength and corrosion resistance.
3. Surface beautification: Shot blasting treatment can give the workpiece surface a uniform metallic color, enhancing its appearance.
FACTORY EQUIPMENT OVERVIEW
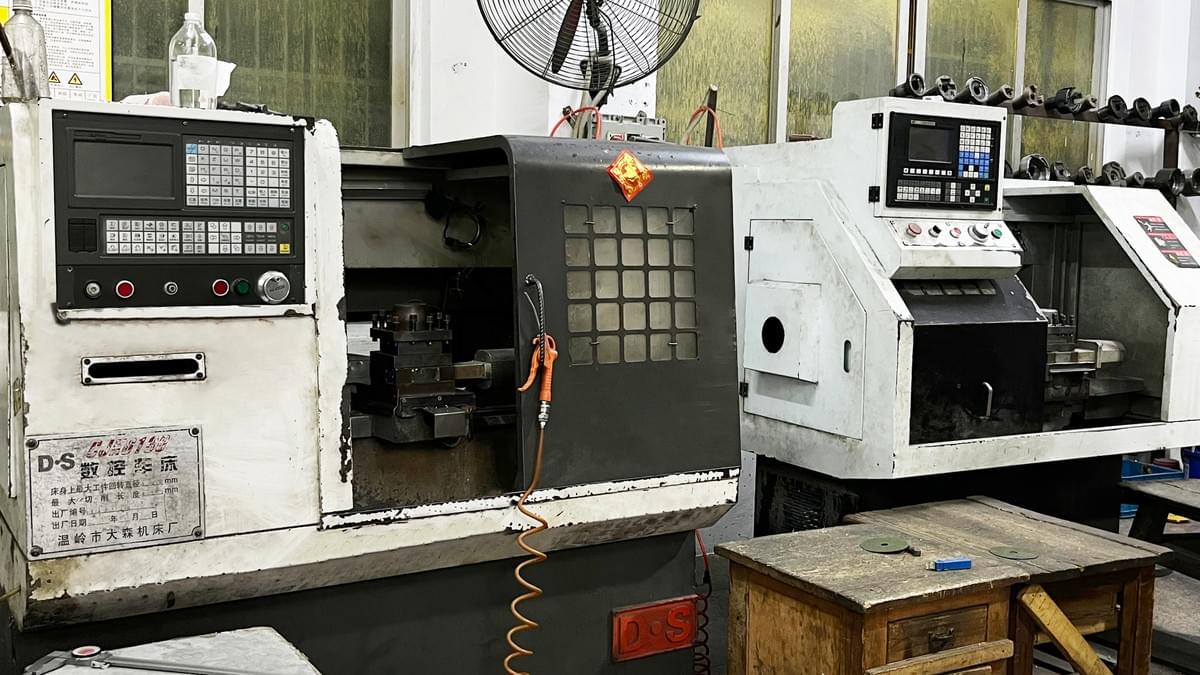
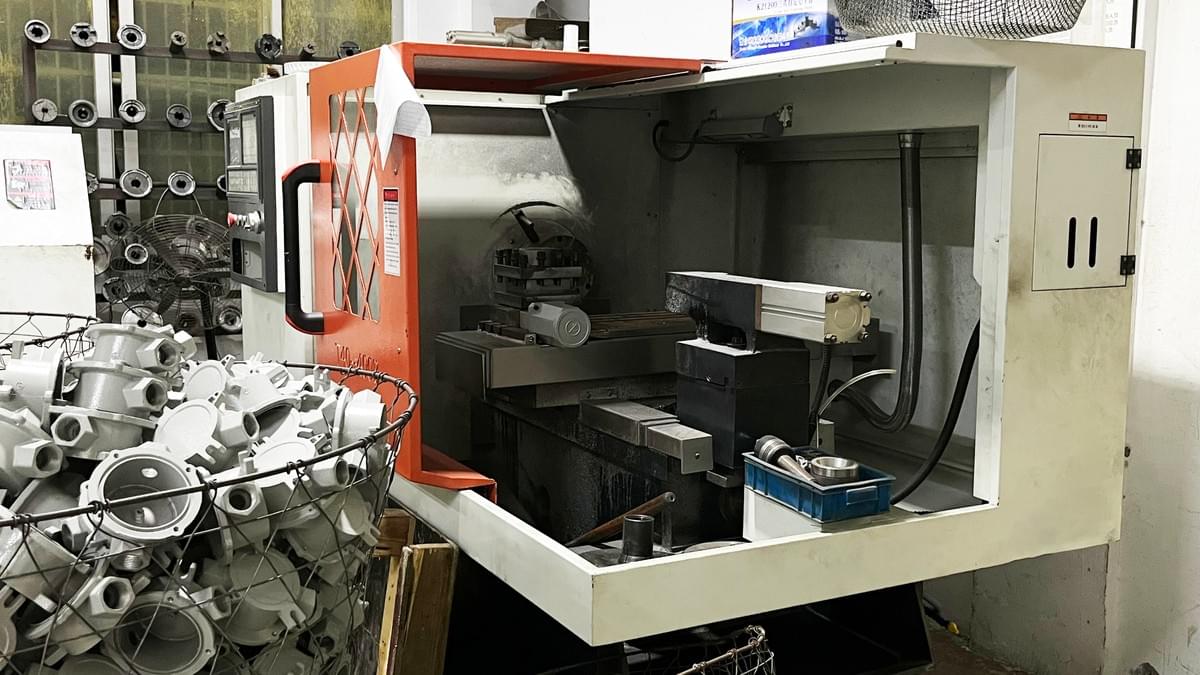
CNC Lathe

CNC Machine Tools

CNC Machine Tools

Mechanical Lathe

CNC Machine Tools

CNC Machine Tools

CNC Machine Tools

CNC Machine Tools
CNC lathe, mainly used for processing shafts, disks, and other rotating body casings. Through pre-programmed processing routines, the CNC lathe can automatically process the workpiece, including cutting internal and external cylindrical surfaces, internal and external conical surfaces with arbitrary angles, complex rotating internal and external surfaces, cylinders, cones, threads, as well as grooving, drilling, reaming, tapping, and boring.
The role of CNC lathes is mainly reflected in the following aspects:
1. Improve machining accuracy: CNC lathes use advanced digital control systems and sensor technology to detect and adjust machining accuracy in real-time, avoiding errors caused by human factors in traditional lathe machining, thereby improving product accuracy and quality.
2. Increase production efficiency: CNC lathes can automatically complete various complex machining processes, greatly reducing auxiliary time such as tool changes and measurements, thus improving production efficiency. Moreover, CNC lathes can achieve 24-hour continuous machining, further enhancing production efficiency.
3. Save labor costs: CNC lathes have a high degree of automation, requiring only a small number of operators to complete a large number of machining tasks, thereby saving labor costs. In addition, CNC lathes can reduce the physical labor intensity of workers and improve the working environment.
4. Expand the machining range: CNC lathes have extensive machining capabilities and can adapt to the machining requirements of parts with different materials, shapes, and sizes. This makes CNC lathes widely used in aerospace, automotive, mold, and other fields.
Finished Product Testing
Every product undergoes extensive testing,achieving a 99.2% pass rate before it reaches you. This stringent process
ensures reliable, high-performance equipment ready for immediate deployment.
Also, we have strict after-sale service to gurantee the quality of your
product.
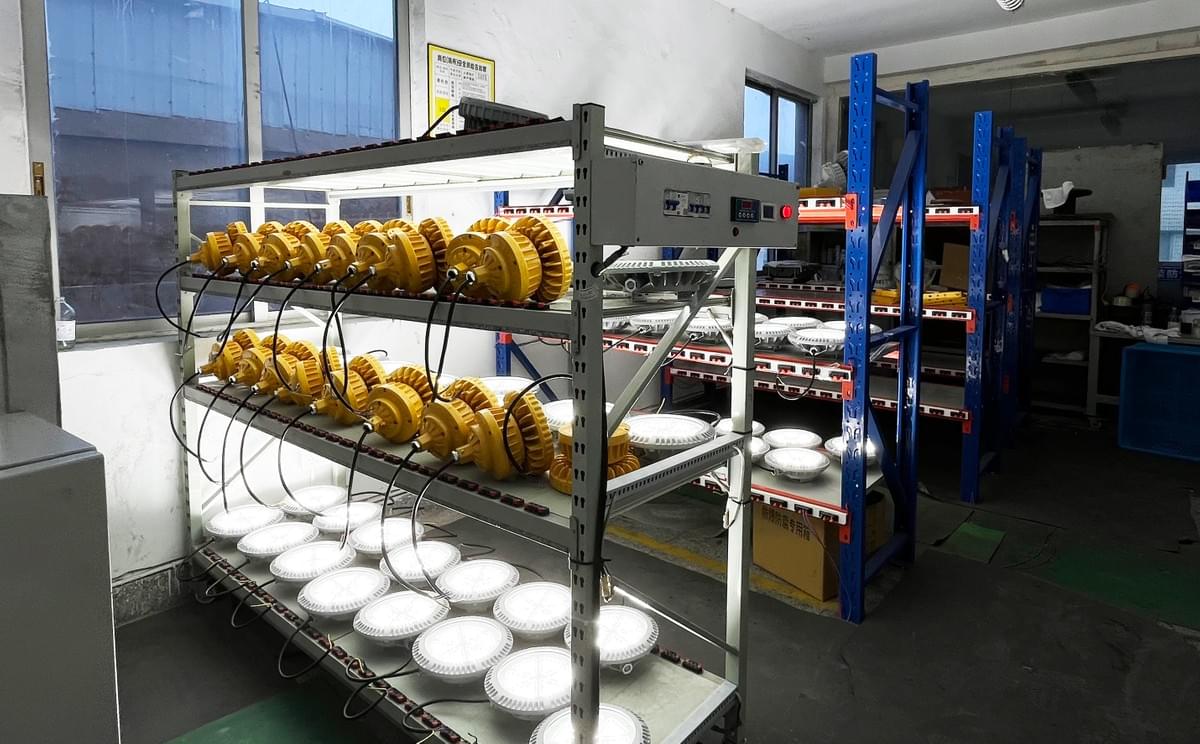
Aging Bench

Programmable Constant Temperature and Humidity Test Chamber

Aging Station

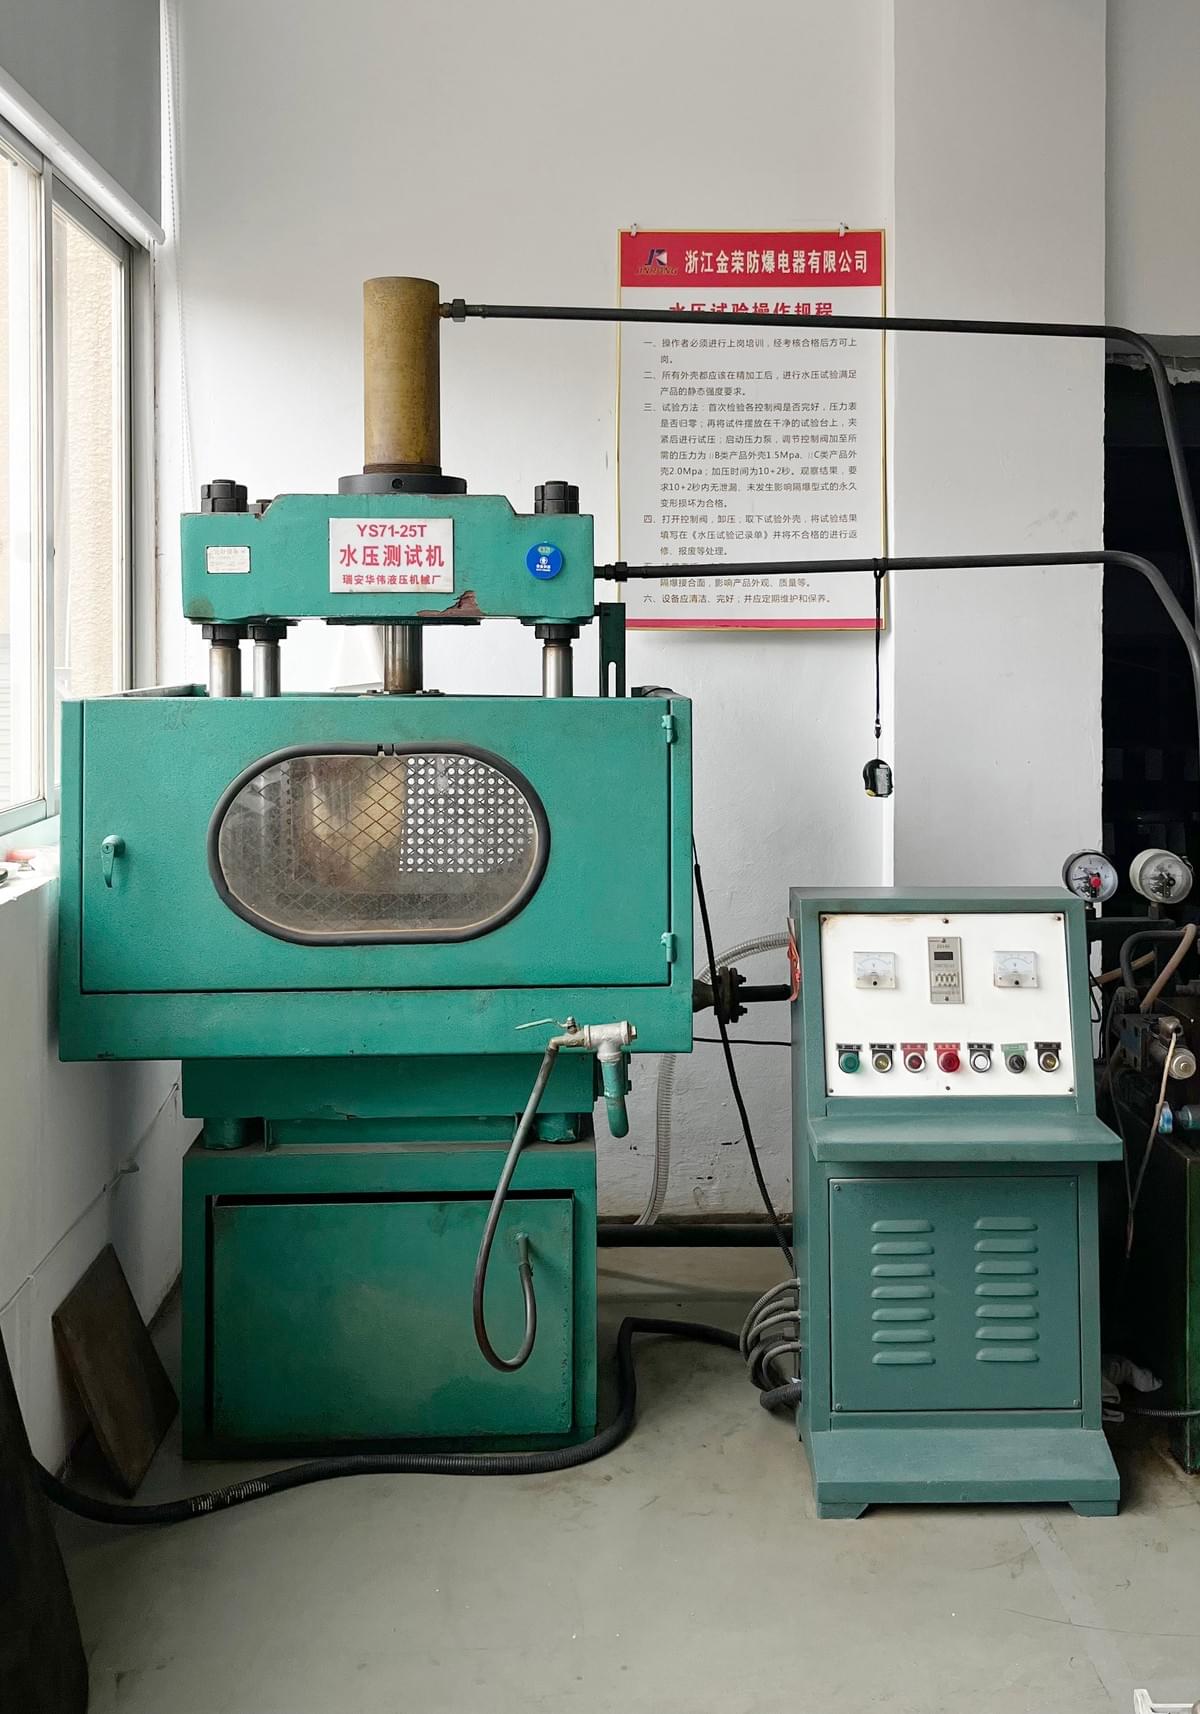
Water Pressure Tester

Photometric Integrating Globe Luminaire Testing
Aging Rack
A luminaire aging rack is a device used to test the performance of luminaires. Its main function is to conduct long-term aging tests on luminaires, simulating the working conditions of luminaires in actual use, to detect their performance stability and reliability. Aging tests can reveal potential problems with luminaires, such as dead lights, dim lights, flickering, color shifts, etc., ensuring that luminaires meet certain quality standards before leaving the factory.
The process of testing luminaires on an aging rack generally includes the following steps:
1. Place semi-finished or dipped high-quality luminaires on the aging rack and connect them to the corresponding switch power socket based on the rated operating voltage of the product.
2. Turn on the power switch of the aging test rack and check whether each luminaire is already illuminated according to the corresponding power switch that matches the input working voltage. Also, ensure that the luminaires operate at full output power during the aging process.
3. The aging test time is generally not less than 24 hours. During the aging process, the luminaires are subjected to multiple power-on and power-off tests, with each power-on and power-off time typically being 20 seconds. Additionally, vibration tests on the luminaires should be conducted periodically (e.g., every 2 hours) during the aging process to ensure stability under vibration conditions.
4. After the aging test is completed, turn off the power switch of each aging test rack. Once the ambient temperature of the luminaires drops to room temperature, remove the luminaires from the aging test rack and proceed to the next process.
5. If any abnormalities occur during the aging process, the test should be terminated immediately. Remove the defective products from the aging rack and record the reasons for the defects. Defective products should be sent to the inspection and repair unit for processing.
6. Aging personnel need to regularly (e.g., every 2 hours) fill out aging record cards to record the aging status of the luminaires.
Through these steps, the luminaire aging rack can effectively test the performance stability and reliability of luminaires, providing important guarantees for luminaire production and quality control. Please note that different types of luminaires and aging racks may have different testing procedures and requirements. Specific operations should refer to the corresponding product manuals or testing standards.
Programmable Constant Temperature and Humidity Test Chamber
Programmable constant temperature and humidity test chamber is a type of equipment capable of simulating different environmental conditions, such as temperature, humidity, etc., to perform performance testing on test items. It is applied in reliability testing of electrical raw materials and components for cold resistance, heat resistance, humidity resistance, dryness resistance, and quality control engineering.
The main function of this test chamber is to evaluate the performance of electrical products under various environmental conditions, such as high and low temperatures, humidity, heat resistance, moisture resistance, and dryness resistance. This is essential for product design, production, quality control, and market sales.
During the testing of casings, the programmable constant temperature and humidity test chamber can simulate various environmental conditions that the product may encounter during actual use, such as high temperature, low temperature, high humidity, low humidity, etc. By placing the casing in the test chamber and setting the corresponding temperature and humidity parameters, any changes in the casing under different environments, such as deformation, cracking, fading, etc., can be observed.
During the testing process, the test chamber automatically adjusts the temperature and humidity according to the set program to simulate different environmental conditions. Additionally, the test chamber is equipped with high-precision temperature and humidity sensors that can monitor and record real-time temperature and humidity changes during the test process. Based on this data, comprehensive evaluation and analysis of the casing's performance can be conducted.
In summary, the programmable constant temperature and humidity test chamber is a powerful testing equipment that provides important support for product design, production, and quality control. It can simulate various environmental conditions for testing and accurately monitor and record various data during the test process, providing accurate basis for performance evaluation of products.
Darkroom
Dark room testing of light fixture brightness refers to testing the brightness of light fixtures in a closed environment without external light interference. This testing method is primarily used to more accurately measure brightness indicators such as luminous flux, illuminance, luminous efficacy, as well as characteristics such as the light distribution and emission angle of the light fixture.
The role of dark room testing of light fixture brightness includes the following points:
1. Eliminating external light interference: Testing in a dark room can avoid the influence of external light on the test results, making the measurement results more accurate and reliable.
2. Simulating real-world usage environments: Dark room testing can simulate the lighting effects of light fixtures in actual usage environments, such as nighttime or low-light conditions, thereby better evaluating the performance of the light fixture.
3. Comprehensive testing: Dark room testing allows for comprehensive testing of light fixtures from various angles and orientations, including the front, side, and back of the fixture, to obtain more comprehensive performance data.
During dark room testing of light fixture brightness, light measurement devices such as photometers and illuminance meters are generally used to measure brightness indicators of the light fixture. Before testing, the light fixture is placed on a testing platform, and its angle and position are adjusted according to testing requirements. Then, the testing equipment collects and analyzes the light emitted by the fixture to obtain brightness data. This data can be used to evaluate the performance of the fixture, compare differences between different fixtures, and provide reference for the design and production of fixtures.
Furthermore, dark room testing can also be used to test and analyze other optical properties of the light fixture, such as color temperature and color rendering index, to more comprehensively evaluate the performance and quality of the fixture.
In summary, dark room testing of light fixture brightness is an important aspect of quality control and research and development in the lighting industry. It provides more accurate and comprehensive performance data for light fixtures, thus offering strong support for the design, production, and application of light fixtures.
Water Pressure Testing Machine
A hydraulic pressure testing machine is a device used to test the water pressure resistance of explosion-proof coiled tubing, waterproof and dustproof lamps, and explosion-proof electrical appliances. Its main function is to test the sealing performance and pressure resistance of products to ensure that they do not leak or rupture under normal working conditions, thus ensuring safety.
During the testing of casings, the hydraulic pressure testing machine uses a pressure pump to provide water flow capacity, pressurizing the tested item (such as a casing) to the set pressure. After a period of time, the changes in the casing are observed. If the casing can remain intact without leakage or rupture under the set pressure, it can be considered to have passed the hydraulic pressure test.
The testing principle of the hydraulic pressure testing machine is to use an air-driven hydraulic pressure intensifier to pressurize water or hydraulic oil and conduct pressure tests on various pipe fittings or valves to detect their sealing performance and pressure resistance. During the test, the pressure can be set via a computer, and the system automatically stops the machine after reaching the specified pressure to maintain pressure. After the specified pressure holding time, the pressure drop is observed to determine the product's quality.
In addition, the hydraulic pressure testing machine can also perform burst pressure tests, in which no upper pressure limit is set, and the system automatically pressurizes until the product ruptures. The system automatically records the maximum pressure reached. This test is typically used to determine the product's maximum pressure resistance capability.
In summary, the hydraulic pressure testing machine is an important testing device that effectively tests the sealing performance and pressure resistance of various products, providing strong protection for product quality control and safe use. During the testing of casings, the hydraulic pressure testing machine can simulate the pressure conditions in actual working environments, providing a comprehensive evaluation and analysis of the casing's performance.
Photometric Integrating Sphere
A integrating sphere, also known as an integrating sphere or luminous flux sphere, is a hollow spherical cavity with an inner surface coated with white diffuse reflective material. The inner surface of this sphere is ideally spherical, and it is required that its deviation from the ideal spherical surface is no more than 0.2% of the inner diameter. The inner surface of the sphere is coated with an ideal diffuse reflective material, commonly using materials such as magnesium oxide or barium sulfate. These materials are mixed with a binder adhesive and uniformly sprayed onto the inner surface to achieve a high diffuse reflectance.
The main function of an integrating sphere is to test parameters such as the luminous flux, color temperature, and luminous efficacy of light sources. Due to the uniform illumination distribution inside the integrating sphere, it can reduce and eliminate measurement errors caused by differences in light shape, divergence angle, and detector response at different positions, thereby improving measurement accuracy. In addition, the integrating sphere can be used in conjunction with a spectrometer by connecting the integrating sphere's light output port to the spectrometer's entrance slit, ensuring that the angle at which the light source enters the spectrometer is the same, significantly improving measurement reproducibility.
When testing the brightness of luminaires, the integrating sphere utilizes the uniform reflection on its inner surface to multiply reflect and superimpose the light emitted by the luminaire inside the sphere, thus forming a uniform lighting environment. Then, by measuring the illuminance or luminance on the inner surface of the integrating sphere, parameters such as the total luminous flux or brightness of the luminaire can be calculated. This method can eliminate the influence of the luminaire's emission angle and shape on the measurement results, making the measurement results more accurate and reliable.
Please note that different types of luminaires and testing requirements may require the use of integrating spheres with different specifications for testing. Specific operations should refer to the corresponding product manuals or testing standards.
Material Storage
Strategic material storage practicesmaintain component integrity for our products, directly contributing to a less
than 0.5% failure rate. Expect unmatched durability and safety from our
equipment.Raw Material Processing
We process tons of high-quality raw materials annually, ensuring the foundation of our explosion-proof equipment is
solid. This results in products known for their robustness and ability to
protect under extreme conditions.The production process of explosion-proof electrical appliances is organized as follows:
1Market demand analysis and design
According to market demand, design electrical appliance tools that comply with explosion-proof standards. After completing the design, conduct drawing review and confirmation to ensure the accuracy and feasibility of the design.
2Tool making and batch recording
Make tools according to the design drawings. Record relevant information for the produced tools for subsequent tracking and management.
3Initial tool processing
Use shot blasting machine to process the initial tools, removing burrs, rust, and other surface defects. The processed tools undergo quality inspection to ensure that the surface cleanliness and flatness meet the requirements.
4Tool processing
Small tools can be finely processed by fitters. Both small and large tools can be processed using CNC lathes to meet different requirements. Shot blasting machine can be used again during processing if necessary.
5Spray coating
Apply spray coating to the processed tools with different colors of explosion-proof paint. The coated tools are dried and cured to ensure that the adhesion and hardness of the coating meet the requirements.
6Semi-finished products warehousing
The semi-finished products after spray coating are respectively sent to warehouses on the 3rd, 4th, and 5th floors for classification and storage. Semi-finished products are labeled and recorded for subsequent tracking and management.
7Assembly and finished product warehousing
Lamp assembly and distribution box assembly work are carried out in the assembly workshop. The assembled finished products undergo quality inspection to ensure compliance with explosion-proof standards and customer requirements. Qualified finished products are placed in warehouses on the 3rd and 6th floors for classification and storage.
8Shipping and packaging
Unified shipment is made from the warehouse on the 6th floor according to customer orders. Packaging is done before shipment, with cardboard boxes collected from the 7th floor. The packaged products undergo final quality inspection and quantity confirmation to ensure accuracy before being shipped to customers.
The entire production process of explosion-proof electrical appliances needs strict quality control to ensure the accuracy and reliability of each link to meet market and customer demands. At the same time, continuous optimization of the production process is required to improve production efficiency and reduce costs.
Get Your Free Quote Now
Feel free to reach out to us.


